Fix 'This Drive Is Read Only' on SD Card/USB/Hard Drive [5 Methods]
Case 1 - USB drive is in read-only mode, how do I change this?
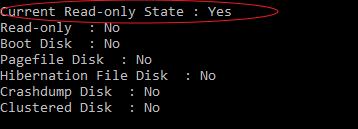
"My USB is read-only, help! I ran DiskPart and looked at the attributes of the disk, and I found that the Current Read-only State was set to yes, but the Read-only was set to No. Where do I start to clear the read-only mode?"
Case 2 - What does it mean when Steam says this drive is read-only?
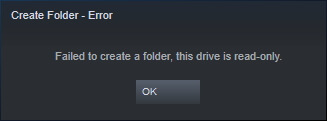
"Tried to create a new folder in the Steam library, but it failed to create a folder, saying this drive is read-only. What does it mean? And how do I fix this issue?"
Is your SD Card, USB, hard disk drive, or external HDD having a "this drive is read-only" error that you can neither access nor modify the drive at all? If it's so, stay here. On this page, you will learn:
- What does it mean when a drive is read-only?
- How to make a drive not read-only?
- Why is my drive read-only?
If you are looking for a way to change drive from read-only to read and write again, follow the fixes as presented below:
About This Drive Is Read-Only Error
To get rid of the drive is read-only error from your SD card, USB, or hard disks, you should first understand: 1. What is the "drive read-only" error? 2. What causes the drive read-only?
Being similar to the write protection error, "Drive is read-only" is a permission error that users can only read or copy saved data on a storage device, but not allowed to write new information or edit the saved data. The "Read-only" state could be on a single file, a folder, or even an entire disk like a memory card, USB flash drive, pen drive, hard disk drive, solid-state drive, and external HDD.
According, the causes of this error are various. Here we collect the most reasons that may lead to a storage device read-only:
- Device is locked
- No write permission to the current disk
- Device file system permission is set to be read-only
- Drive or file is set with read-only permission
- Drive is write-protected
How to Remove 'This Drive Is Read-Only' Error
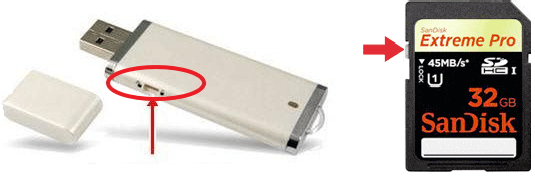
If it's an SD card or USB flash drive showing read-only, first you can check the lock switch is on or not. Like the below picture demonstrates:
For hard disks and other types of memory cards and flash drives, the following troubleshooting will show you how to remove the error and make your device readable and writeable again:
- #1. Login as Administrator and Access Read-Only Drive Again
- #2. Clear Read-Only Error from Hard Drive/SD Card/USB
- #3. Change Read-Only Permission
- #4. Take Ownership of Folder and Gain Write Permission
- #5. Remove Write-Protection from Disk
You can follow the guide step by step to open and make full use of the read-only drives without any obstacles.
Using a Mac computer? Go to how to fix the external hard drive read-only on Mac for help.
#1. Login as Administrator and Access Read-Only Drive Again
Applies to: Remove read-only state from the hard drive by logging in as administrator.
Sometimes, when you log in to computer with another user account, but not as the administrator, you may have a problem in gaining permission to read and write on storage devices. So, if you are having a read-only state drive on your computer, you can first try to log in as an administrator first.
Here are the steps:
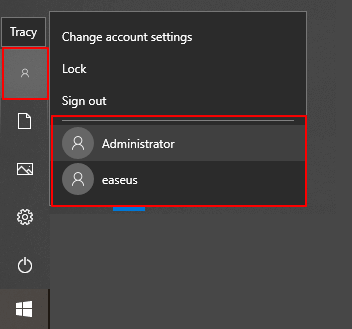
Step 1. Click the Windows icon and click your username at the top.
Step 2. Select the other visible account on the list, click to switch to Administrator.
Step 3. Sign in with the password of your administrator account.
After this, you can try to open the drive which was with a read-only state and check if you can write to the drive. If yes, congratulations. If not, don't worry. Try the other four presented fixes, one can help you out.
#2. Clear Disk Read-Only Error from Hard Drive/SD Card/USB
Applies to: Remove read-only state from hard drive, USB, SD card, etc.
To clear the Read-only state from your hard drive, you'll need to turn to DiskPart command lines for help. This is how to list the disk in read-only status and how to clear read-only from it:
Step 1. Connect the drive to a Windows computer, and Windows will assign a drive letter to it.
If it's a memory card or USB flash drive, it should be a removable disk.
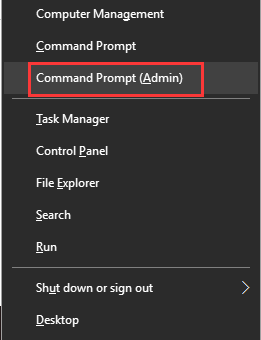
Step 2. Press Windows + X keys to bring up a dialogue and click "Command Prompt (Admin)".
Step 3. On the Command Prompt windows, type DiskPart and hit Enter.
Step 4. Type list disk and hit Enter.
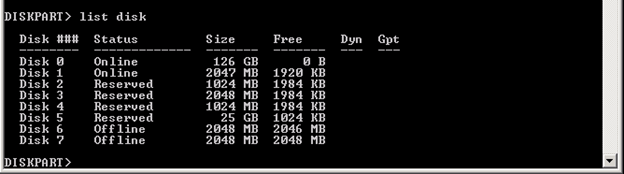
Step 5. Continue typing select disk n and hit Enter.
N stands for the drive number of the drive you see from the step 4 result, e.g. select disk 1.

Step 6. Type attributes disk to see the attributes of Disk 1.
As you can see, the Current Read-only State and Read-only are both set to Yes.

Step 7. To clear the Read-only attribute, type attributes disk clear readonly and hit Enter.
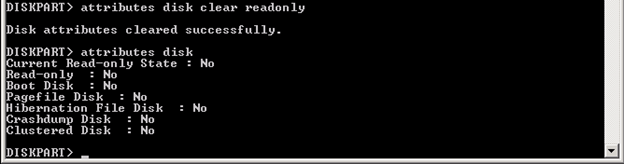
Step 8. Soon the attributes are set to No. Type exit to close the Command Prompt.
To sum it up, to remove SD card read-only as well as other storage memory, you must run DiskPart commands including:
#3. Change Permission to Make a Drive not Read-Only
Applies to: Change hard drive, SD, USB from read-only to read and write state in Windows Property settings.
Mostly, it happens to a folder or a specific file that may set to be read-only state on Windows PC or a game drive. When you tend to create a new folder or add a new file to the specific location, Windows will warn you that the drive is read-only.
You can simply set the device to read and write state via its Properties settings with the following steps:
Step 1. Open Windows File Explorer in Windows 10/8/7.
Step 2. Connect the read-only drive to PC, right-click on the drive, and select "Properties".
Step 3. Under the Security tab, tick "Read" and "Write" in the Allow column. Click "Apply".

If it's a read-only folder that leads to your drive unwritable, take the operation as listed here:
Right-click on the folder > go to Properties > On General tab, uncheck "Read-only" next to the Attributes sectioin > Click "OK".

#4. Take Ownership of Folder and Gain Write Permission
Applies to: Take ownership of a specific folder or drive so as to gain the write permission.
Sometimes, when your current user account doesn't have the permission to write on a specific file, folder, or drive, you'll encounter a read-only issue. To resolve this error, you can follow steps here to take ownership of your drive:
Step 1. Right-click on the read-only folder or drive, click "Properties" from Context Menu.
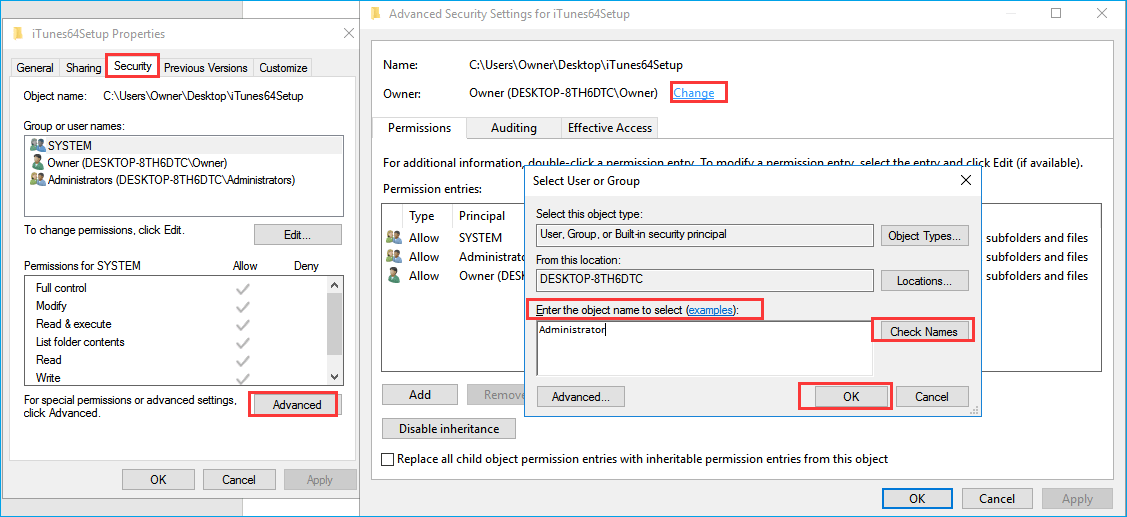
Step 2. Click "Security" > "Advanced", and click the "Owner" tab.
Step 3. Click "Change" on the popped up screen, enter Administrators or your user name under the Enter the object name to select section.
Then, click the "Check Names".
If all goes well, the input will change. Click "OK" to save changes.
Step 4. Check "Replace owner on sub containers and objects" and click "Apply" and "OK" to save changes.
Or you can check the "Replace all child object permission entries" option.
#5. Clear Write Protection to Remove Read-Only State
Applies to: Remove write-protection from the drive, USB, or SD which seems to be with the read-only error.
If you are not a professional in computing management and not familiar with command lines, don't worry. Qiling R&D team has promoted a fresh kit for helping you resolve the write-protection issue on your hard drive, external hard drive, USB or SD card, etc., devices.
Qiling CleanGenius is a practical computer fixing tool that is safe and light-weighted. It's a perfect alternative to the command line.
Use this one-click tool to solve the write-protection issues on your own:
If you don't consider yourself a pro-computer user and you're not familiar with command-lines, don't worry. There are graphical-based solutions to help you remove write-protection from your hard drives, USB drives, and even SD cards.
Qiling CleanGenius is one of these tools that helps you fix aforementioned issues on your drives without knowing a thing about command-line.
Here's an easy-to-follow guide on how to use this tool to get your issues sorted:
Step 1: DOWNLOAD and install Qiling CleanGenius (free) on your computer.
Step 2: Run Qiling CleanGenius on your PC, select Optimization and choose the Write Protection mode.
Step 3: Select the device that is write-protected and click Disable to remove the protection.
After following through with all the above solutions, hopefully, you have cleared the read-only error from the storage devices, and be able to use the drive again as normal. Now, you may open the drive to access and save new data to your drive.
Don't worry if you see now files show up or you cannot open saved data. The supplementary data recovery solution as presented in the next part can help.
Bonus Tip: Recover Data from Removing "Drive Is Read Only" Error
Applies to: Recover data after removing the read-only error from a drive, SD card, USB, etc.
After removing the read-only error, some people may find their files are not visible or accessible. Formatting will make the device viable for data storage again but data will get erased.
Fortunately, Deep Data Recovery is available when data loss happens during the course of troubleshooting. You don't need to pay a penny to test its capability of finding lost data. For an attempt, we suggest you download the free version, which allows for 2GB file recovery for free.
For example, to recover data from an external hard drive, follow the steps:
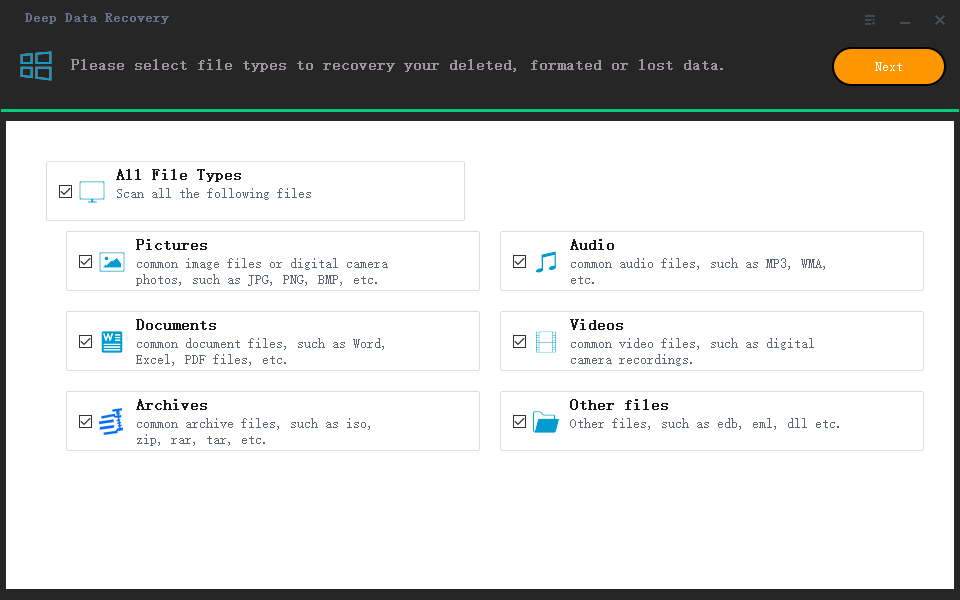
Step 1. Use a correct USB cable to connect your external hard drive to your computer. Run Deep Data Recovery and select file types and click "Next" to start
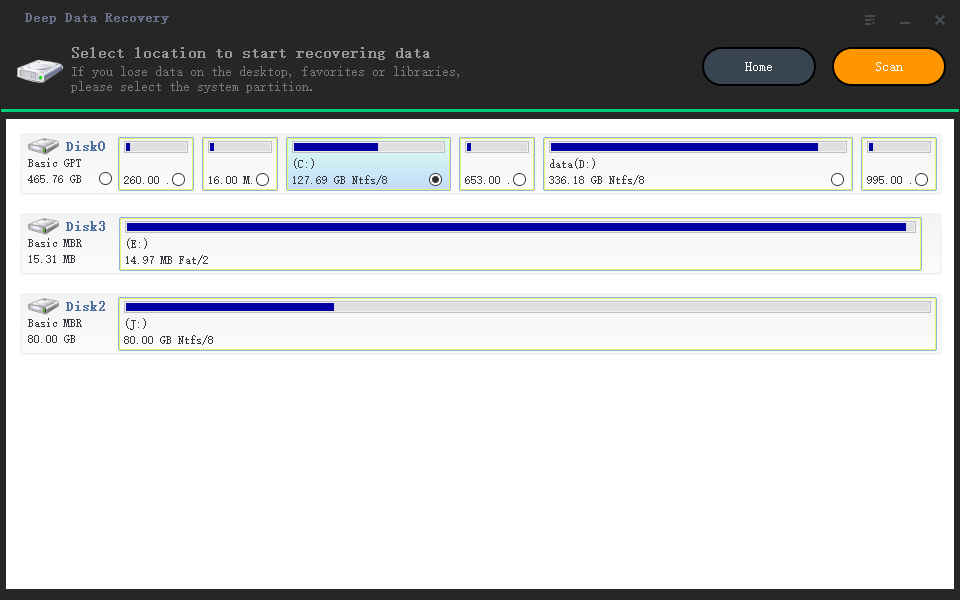
Step 2. In the next window, you will see your external disk under External drives. This software supports all the popular external disk brands, including WD, Seagate, Toshiba, LaCie, SanDisk, Samsung, etc.
Select the external hard drive and then click the "Scan" button.
Step 3. As soon as the scan process starts, the software will find more and more lost and deleted data and display the data in the scan results. The recovered data will be nicely organized. You can quickly find the target files/folders by file type or search in the search box with exact file name.
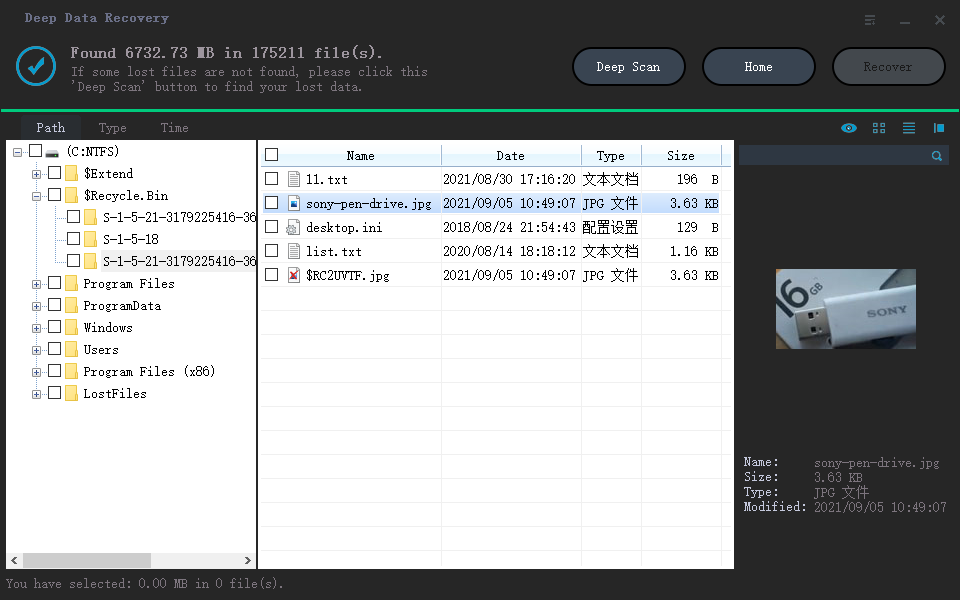
Step 4. You can preview the files found by Deep Data Recovery's scanning algorithms. Then, select files and click "Recover". To avoid data overwriting, we recommend that you save the recovered data to a different drive than the original Seagate drive.
Conclusion
On this page, we explained what is Read-only error, what causes this error, and how to fully remove read-only from hard drive, USB, SD card, etc., storage devices.
If you are having a similar issue on your hard drive, check if you are logging as administrator first. If not, switch to the administrator account. If the drive is still read-only, try to take ownership of your drive. Then you can turn to DiskPart cmd command - attributes disk clear readonly to remove this issue.
After this, you can try to open your drive and modify the saved data again. If you lost data, turn to Deep Data Recovery for help. Besides restoring lost files, you can also apply this software to scan a whole disk or even lost partition for retrieving vital files.
Related Articles
- How to Solve Can't Format SD Card on Android Phone, Camera, and Windows PC
- [SOLVED] USB Keeps Disconnecting and Reconnecting Windows 11/10
- Fix The Parameter Is Incorrect on External Hard Drive in Windows
- [5 Free Ways] How to Remove Write Protection from USB in Windows