How to Lower Disk Usage in Windows 10 from 100% to ...0%
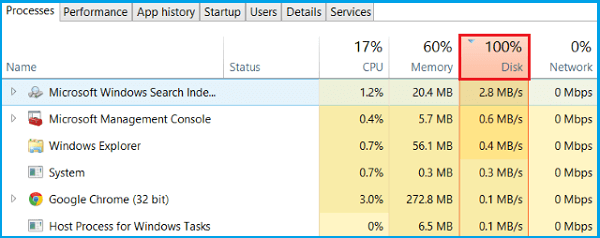
A very high disk usage is a bad thing. If you see a disk usage reaching or near 100% on Task Manager (Ctrl+Alt+Delete) in Windows 10 or other earlier versions, there is probably a hard disk or operating system issue. The excessive disk usage will cause your computer to slow down, become laggy and unresponsive. As a result, your PC cannot perform its tasks properly.
What Is Disk Usage?
Disk usage (DU) refers to the portion or percentage of computer storage that is currently in use. It contrasts with disk space or capacity, which is the total amount of space that a given disk is capable of storing. Thus, when we speak of high disk usage, we're addressing a problem (the higher the disk usage is, the slower your machine will run). If the disk usage hits 100%, your computer will "freeze", and stay that way until all of the processes have had an opportunity to carry out their assigned task.
How to Lower Disk Usage Effectively (14 Ways)
| Workable Solutions | Step-by-step Troubleshooting |
|---|---|
|
Disable Suspicious Programs |
1. Restart PC...Full steps |
| Advanced Troubleshooting |
7. Check disk for errors...Full steps |
| Other Possible Troubleshooting |
11. Change settings in Google Chrome...Full steps |
Anytime when you experience a slow response time on a computer, you shall look into the Task Manager to find out what task is draining the resource at the moment. Are they Apps or background processes? If find any, directly click "End task". If not, go ahead with the 10 best ways to reduce the disk usage to a normal state, usually 0%, and hopefully fix the 100% disk usage issue on a computer.

Way 1. Restart Your Computer
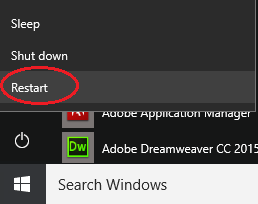
Sometimes the task manager cannot identify which process is the real culprit of eating up the disk usage, in this case, try to restart your computer for the first attempt which can resolve all kinds of issues. You shall use "Restart", which removes the old windows state and starts your system in a fresh look, instead of "Shut down".
To restart your computer:
- Press the Windows key
- Click on the Power icon
- Click Restart, which will close all apps, turn off the PC and then turn it on again
Do you still see 100% disk usage even the system state is fresh and new? If yes, that's not a big deal and the reason behind is not that important as well. Otherwise, you should take further measures to restore your computer disk usage to a normal state.
Way 2. Check for Malware Infection
Malicious software or computer viruses could do damage to your computer data, system performance and most of all, drain computer resources. The bad thing is that malware is usually invisible to our eyes, we have to dig it out by using professional antivirus software. Thus, scan your PC right away to find out what is attacking your system. You can make full use of Windows Defender if you didn't install any third-party program.
To run Windows Defender in Windows:
Settings -> Update & Security -> Windows Defender -> Open Windows Defender -> Full
Way 3. Disable Your Main Antivirus Program Temporarily
Instead of using the antivirus software to check for malware infection, this time try to close your main antivirus software. As Microsoft support investigated, many third-party antivirus programs are set to protect the computer without a break. They work 24 hours a day to scan the hard disk to resist the potential damage from unknown sources, which at the same time, taking up high disk usage.
If turning off the antivirus software helps restore the disk status, you might contact the vendor to report the issue, and let them give you a compromised solution to how to safeguard your computer while not causing the high disk usage problem.
Way 4. Disable Windows Defender Temporarily
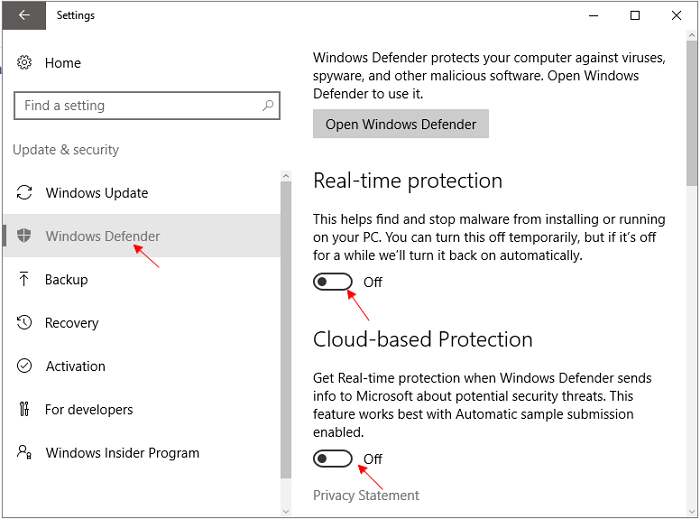
In fact, Windows Defender is running in the background when your main antivirus program is not working. For average computer users, they don't even notice the existence of the inbuilt program that helps resist malware threats but increases the risk of disk usage being high. What's more, Windows Defender can work in conflict with your main antivirus program, making the disk usage max out.
To disable Windows Defender:
- Click Start and go to Settings
- Choose Update & Security
- Click Windows Defender, and turn off Real-time protection as well as Cloud-based Protection
Way 5. Disable Windows Search Temporarily
If the high disk usage problem arises from a search loop in Windows 10, you can try to disable the Windows Search function specifically.
First, use the method to temporarily close the Windows Search to identify the problem:
- Press Windows + R keys, type cmd in the Run box to open the Command Prompt
- Type the command: net.exe stop "Windows search" and hit Enter
This command is used to stop Windows Search from running until the next time Windows is restarted. Go back to the Task Manager and check if the disk usage percentage is normal. If yes, the Windows Search should be responsible for the issue, and you'd better close it permanently.
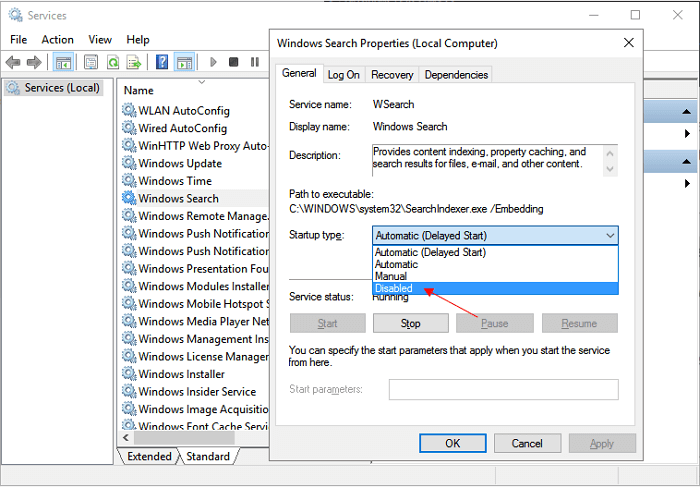
To disable Windows Search permanently, you need to do it this way:
- Press Windows + R keys and enter services.msc in the Run box
- In the services window, select Windows Search entry and double-click it to update its properties
- Under Startup type, select Disabled and then OK to save the changes you made
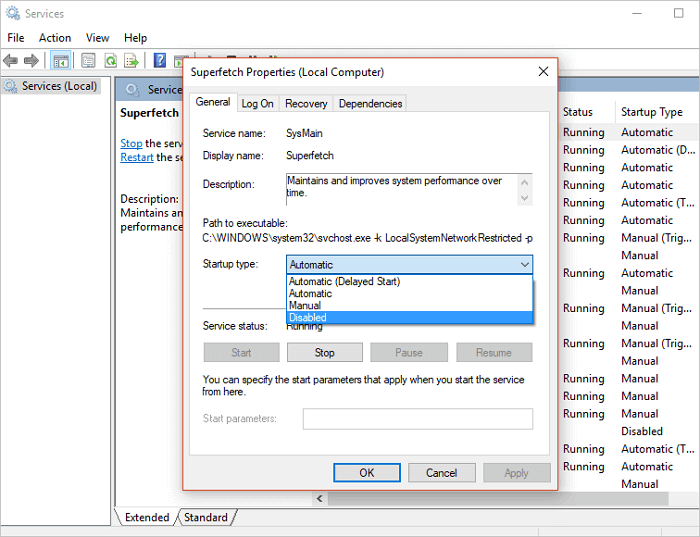
Way 6. Stop the Superfetch Service
Superfetch is a kind of Windows service that is intended to make your applications launch faster and improve your system response speed. However, the Superfetch service is prone to cause problems in high disk usage in a similar way as the Windows search does. You can try to disable the service for a short period of time to see if the disk usage can be reduced.
Here's how to disable Superfetech service in Windows 10:
- Press Windows + R keys and enter services.msc in the Run box
- The Services window displays. Find Superfetch in the list
- Right-click Superfetch and then select Properties
- Select the Stop button if you wish to stop the service. In the Startup type dropdown menu, choose Disabled
Way 7. Check Disk for Errors
The disk usage is showing abnormally high, which can also indicate a hard disk issue. The way of checking hard disk errors like file system corruption and bad sectors is within the Windows CHKDSK utility. The check disk tool can be run via Command Prompt, and you should apply the proper command lines to address the issue.
For users who are not familiar with the Windows command lines, we suggest you directly download a free partition manager on your PC, for example, Qiling Partition Master Free. It is an intelligent disk & partition management tool that works automatically on checking disk errors and repairing the errors if find any.
Step 1. Right-click the target partition that has a problem.
Step 2. Choose "Advanced" > "Check File System".
Step 3. In the Check File System window, check the "Try to fix errors if found" option.
Step 4. Click "Start" to check errors on your partition.
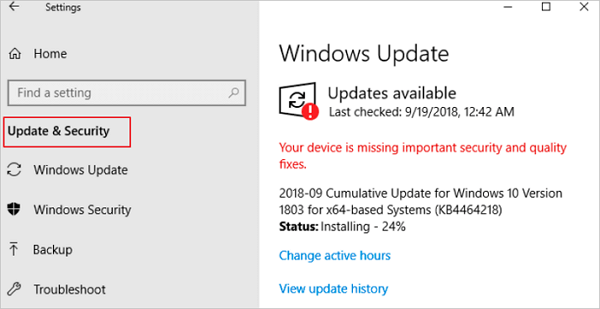
Way 8. Update Your System
How long have you been not getting the Windows update? Is your Windows version too old to run fluently? The 100% disk usage issue has been reported to Microsoft support many months ago, and Microsoft engineers have done a lot of work to release a new update to solve the problem. Though many people are used to working with an accustomed OS state, we still recommend you try to update your system if none of the above methods are valid in this case.
To get the latest Windows update:
- Click Start and then select Settings > Update & security > Windows Update
- If you want to check for updates manually, select Check for updates
- Select Advanced options, and then under Choose how updates are installed, select Automatic (recommended)
Way 9. Reset Virtual Memory
Most of you may not know what Virtual Memory is. Here, you should take a little effort to do some changes there, to hopefully fix the 100% disk usage issue. To put it simply, Virtual Memory shows you how much of your hard disk drive (or solid state drive) is being used by Windows as if it was memory in your computer. If your computer isn't running well, and your Disk column in Task Manager said 100%, resetting this Virtual Memory should help. The procedure takes a longer time than that of the former methods, so be patient and be careful.
To change virtual memory size on Windows 10:
- Open Settings > System > About
- Under the Related settings section, click System info
- Click the Advanced system settings from the left pane
- Now click the Advanced tab, under the Performance section, click Settings
- Click the Advanced tab, and under the Virtual memory section click Change
- Here, you need to clear the Automatically manage paging files size for all drives option, and select the Custom size option
- Enter an Initial size and Maximum size for your virtual memory and click Reset. Click OK and restart your PC

Quick tip: The size of the virtual memory is unique to each device, and it can't be generalized. However, usually, it's recommended to use a number that's one and a half times the total available memory for the "Initial size" and three times of available memory for the "Maximum size" when possible.
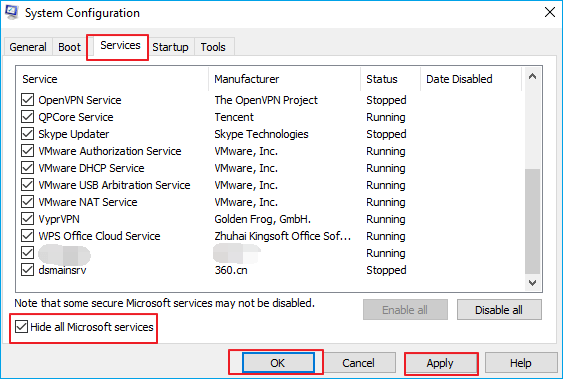
Way 10. Perform a Clean Boot
Though the disk usage is clearly showing as 99% or 100%, when you look into the Apps or background processes, you can find no trace. What's more, you've tried all the basic troubleshooting workarounds you can come up with. At this moment, a clean boot may help. A clean boot starts Windows with a minimal set of drivers and startup programs so that you can determine whether a background program is interfering with your disk usage. Similar to reset the virtual memory, it takes a few steps to perform a clean boot from the start to finish.
- Press Windows + R keys and enter services.msc in the Run box to open the System Configuration
- Under the General tab, click Selective startup. Uncheck the option Load startup items and click Apply
- Now turn to the Services tab, select Hide all Microsoft services and then select Disable all
- Restart your computer and this time the system will start in a clean boot environment
What Else Can You Do to Reduce the 100% Disk Usage in Windows 10/11
The solutions to lower the disk usage issue are far from the mentioned 10 ways. As a matter of fact, each computer has its special hard disk issue that may not look like a common one, all you have to do is spending time with more and more possible fixes. So, what else can you expect to lower a high disk usage in Windows 10?
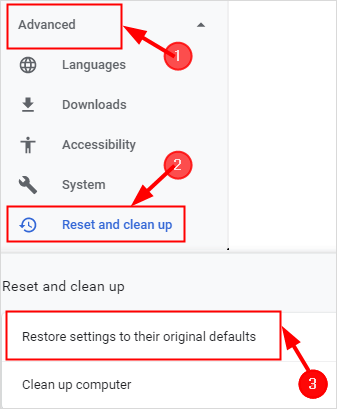
Way 11. Change Settings in Google Chrome
- Open Chrome
- Click Settings > Advanced settings
- Under the Privacy and security section, clear the Use a prediction service to load pages more quickly option
Way 12. Update your Skype Settings
- To start Skype for Windows 10, select the Start menu from the bottom left of your screen. In the list of available applications, scroll down to Skype for Windows 10 and click to open it.
- Select the Security tab and click on the Edit option.
- In the list of "Groups or Usernames" select "ALL APPLICATION PACKAGES". Check the Write option to select Allow which lets Skype write to your disk.
- Press OK.
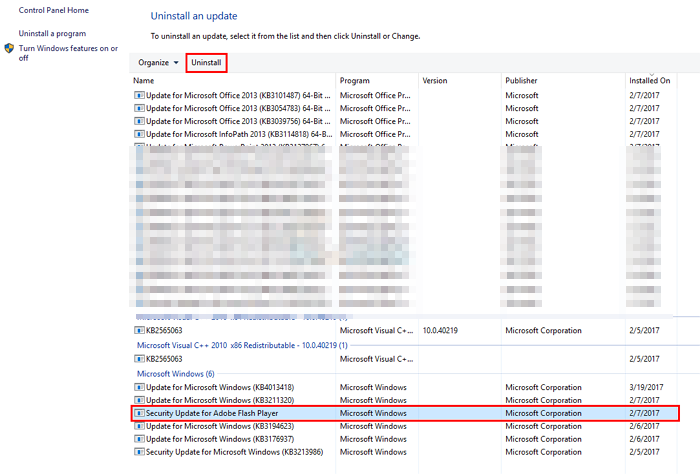
Way 13. Uninstall Flash Player Updates
- Open Settings > Update & Security
- Select Update History
- Select Uninstall Updates
- Scroll down and look for the Adobe Flash Player update
- Select the Adobe Flash Player update and select Uninstall
- Follow any additional on-screen instructions
Way 14. Upgrade Hard Disk in 100% Usage
Last but not the least, if all the attempts failed to lower the disk usage in Windows 10, you have to accept the truth that something wrong goes with your hard drive, which is probably a serious one. When physical issues on a har drive arouse, the computer will hugely slow down, constantly crash or freeze, and accordingly throw the vexing 100% disk usage warning. It's time for you to recover data from a failing hard drive, and then swap the hard drive without reinstalling Windows and data.
*** If the computer can still boot normally, but the hard drive becomes inaccessible, you must perform a data recovery promptly.
Download Qiling hard drive recovery software on your PC and take the following three steps to extract data from the problematic hard drive.
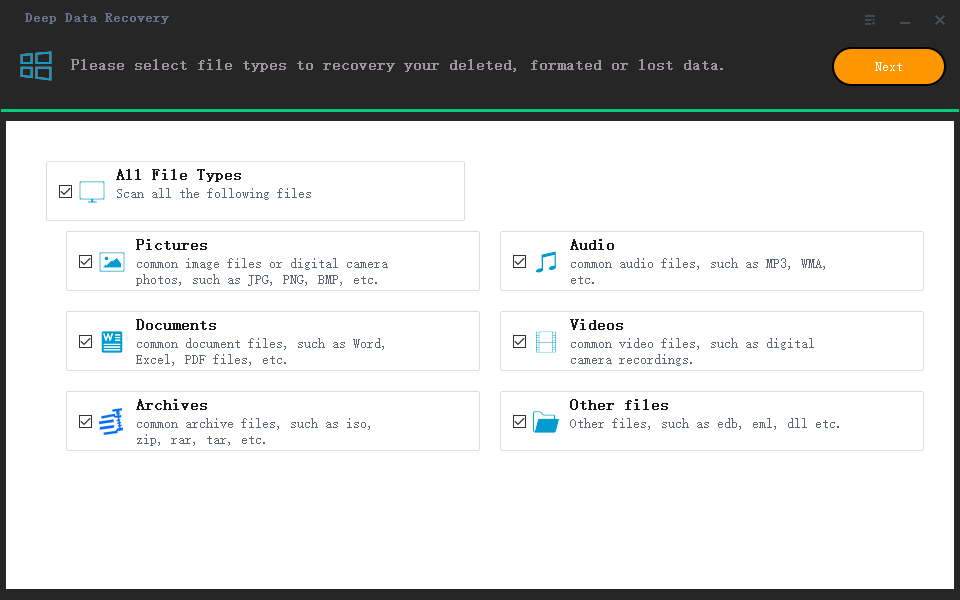
Step 1. Launch Deep Data Recovery. Select file types and click "Next" to start.
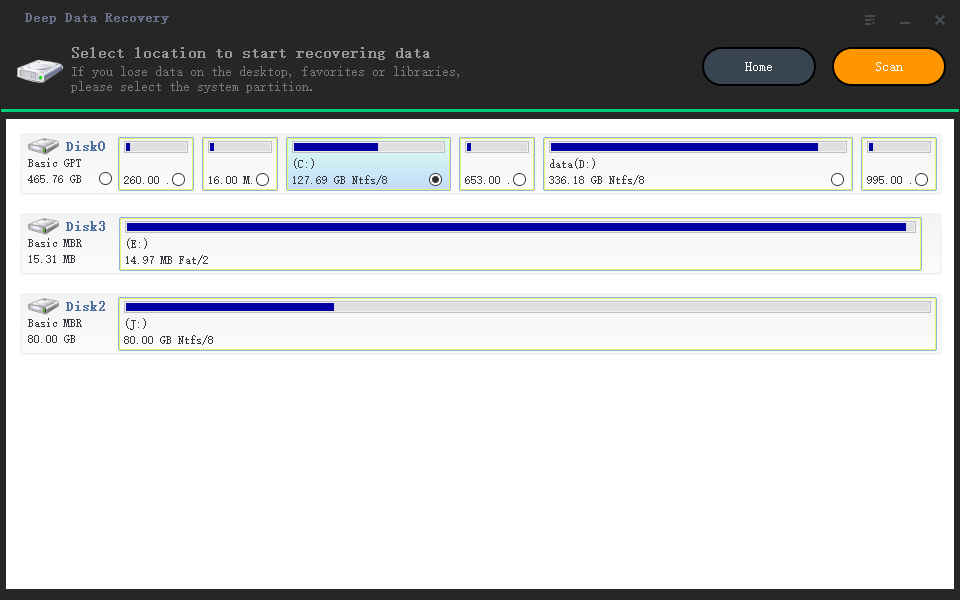
Step 2. Select the drive where you lose your data and click "Scan".
Step 3. Use "Filter" or "Search" to find the lost files when the scan completes.
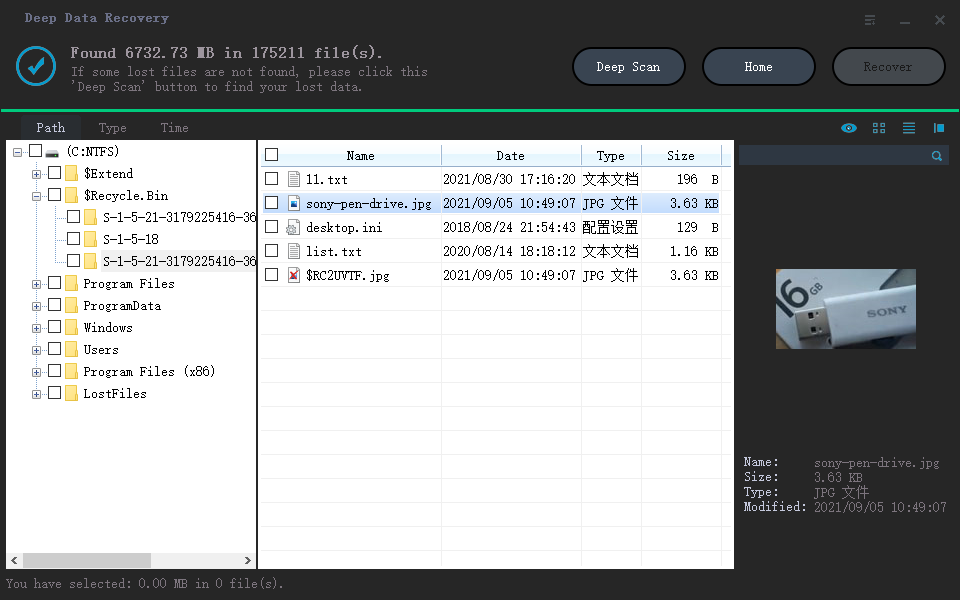
Step 4. Select all the files you want and click "Recover". Then, browse another secure location to save them.
*** It has no problem to recover data from an unbootable hard drive as well. In this case, download Deep Data Recovery Pro with Bootable Media and perform the data recovery without OS.
What's the simple way to replace a failing hard drive without reinstalling Windows? As you may hear, a reliable disk cloning utility with the ability to clone a whole HDD or SSD to the other would realize the goal.
Qiling Disk Copy, the other Qiling program that is trusted by millions of worldwide users, is good at cloning HDD to SSD, migrating OS to HDD/SSD, upgrading a small HDD to a big one, or replacing a failing hard drive with a robust one.
For example, to clone an HDD to SSD with Qiling disk copy software, watch this video guide for detailed instruction.
Related Articles
- 2022 Quick Format Recovery: Recover Data/Files from Hard Drive after Quick Format
- 2022 Fix: Discord Not Opening, Stuck or Not Responding on Startup
- How to Fix Windows 10 Error Code 0xc00000e Without Data Loss
- Terraria Load Failed No Backup Found (Terraria Data Recovery)