Recover Data from Dead, Failed or Crashed SSD in Windows 11/10
"About half a year ago, I replaced my old hard drive with a Samsung SSD drive and upgraded my computer from Windows 7 to Windows 10. The SSD disk suddenly died for an unknown reason.
I know I can buy a new SSD disk to replace it, but the problem is that I have stored many working files on the SSD. Is it Possible to recover data from dead or failed SSD?"
Is It Possible to Recover Data from a Dead, Failed, or Crashed SSD
- How to recover data on a failed SSD?
- If an SSD crashed/dead/failed, can files on it be recovered?
- Can data be recovered from a failed SSD?
- What to do if my SSD dies with no backup?
When SSD drive crashes or fails to boot, what comes to your mind first? Data recovery or repair of the corrupted SSD? Of course, data always comes first, right? And the good news is that data saved on a failed or dead SSD drive can be recovered.
How to Recover Data from Dead, Failed, or Crashed SSD
For most users who know little about SSD data recovery, this job might be quite tricky. But if you find the right way, it will become much easier. Then what is the best way for dead or failed SSD data recovery? You have two choices:
- SSD Repair at a local storage device repair center
A manual data recovery service and repairing failed SSD usually cost hundreds of bucks. And it's extremely slow, taking for 1 week or so.
- Apply reliable data recovery software for help
Professional data recovery software requires a reasonable price for data recovery. And you can immediately start the recovery process once you've downloaded the software.
Qiling file recovery software - Data Recovery Wizard is designed for users to recover lost files from a dead hard drive, or a failed SSD disk other storage devices when a disaster happens unexpectedly.
We personally suggest you try the second way for dead SSD data recovery. It's instant and secure for protecting your personal data and private information. And you can refer to either method here below to perform dead SSD data recovery.
Solution 1. Recover Data from Dead SSD on a Healthy Computer
Applies to: dead SSD data recovery on another healthy computer
If you have two computers, you can follow guidelines here as a guide to restore the dead SSD disk data to a secure device on a healthy computer:
1. Connect Dead, Failed SSD to Another Computer as a Data Disk
Step 1: Remove the dead SSD disk from the source computer and connect it to another healthy computer as a data disk.
Step 2: Restart the computer and check if you can access the saved data on SSD.
- If yes, congratulations. Your SSD is running fine, and the problem exists on the hardware of your computer.
- If not, don't worry. Follow the guide steps below to restore data from the dead SSD.
2. Recover Data from a Dead SSD with Qiling SSD Recovery Software
With the powerful data recovery capacity and wizard-like interface, Deep Data Recovery enables you to recover data from failed or crashed SSD with just a few simple clicks.
Here is the step-by-step guide:
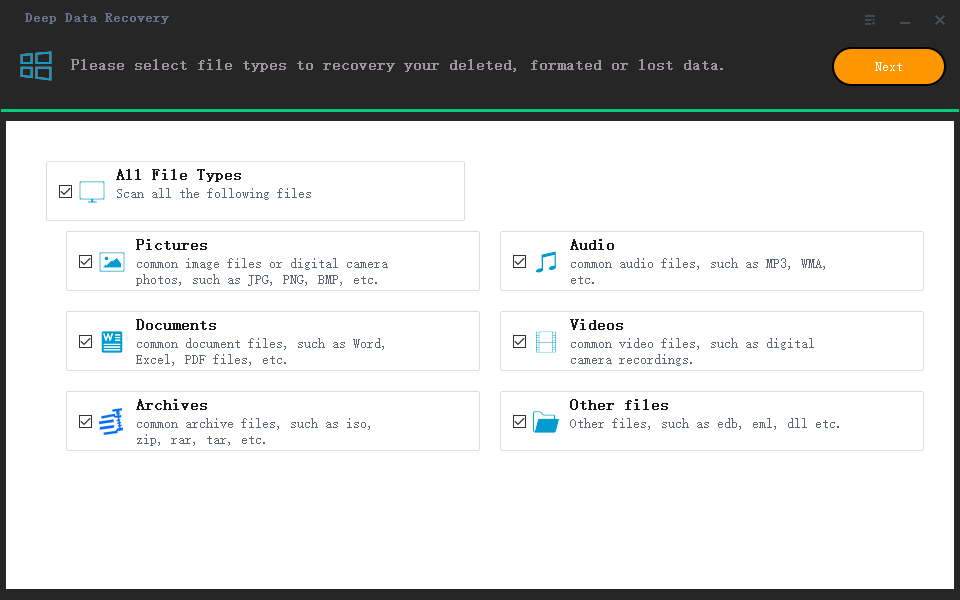
Step 1. Select file types and click "Next" to start
Open Deep Data Recovery. Select file types and click "Next" to start.
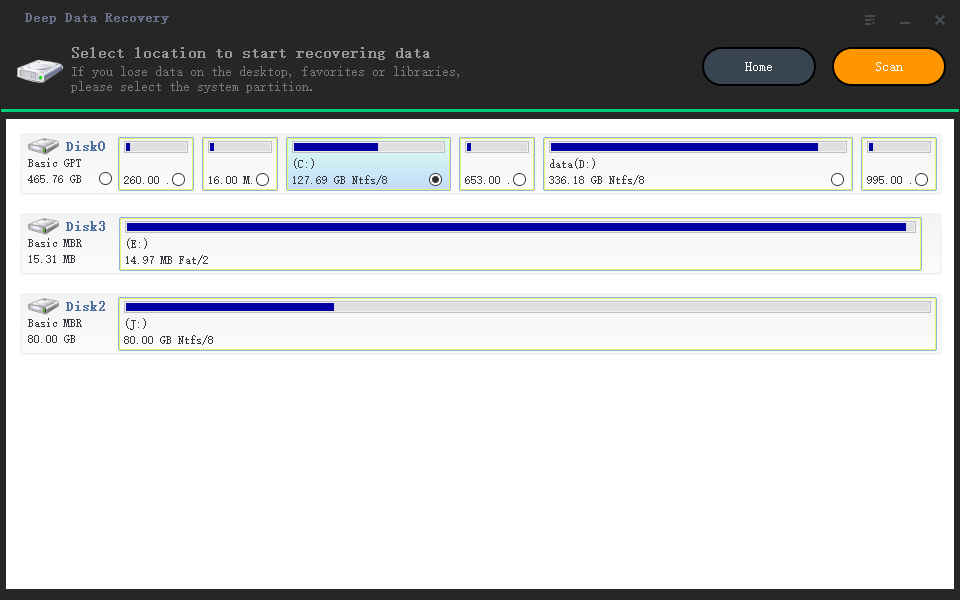
Step 2. Scan the SSD
Select the SSD where you lost data, and click the "Scan" button.
Step 3. View the results
When the scanning finishes, find lost SSD data by using the "Filter" and "Search" options after checking the "Deleted Files" and "Other Lost Files" folders.
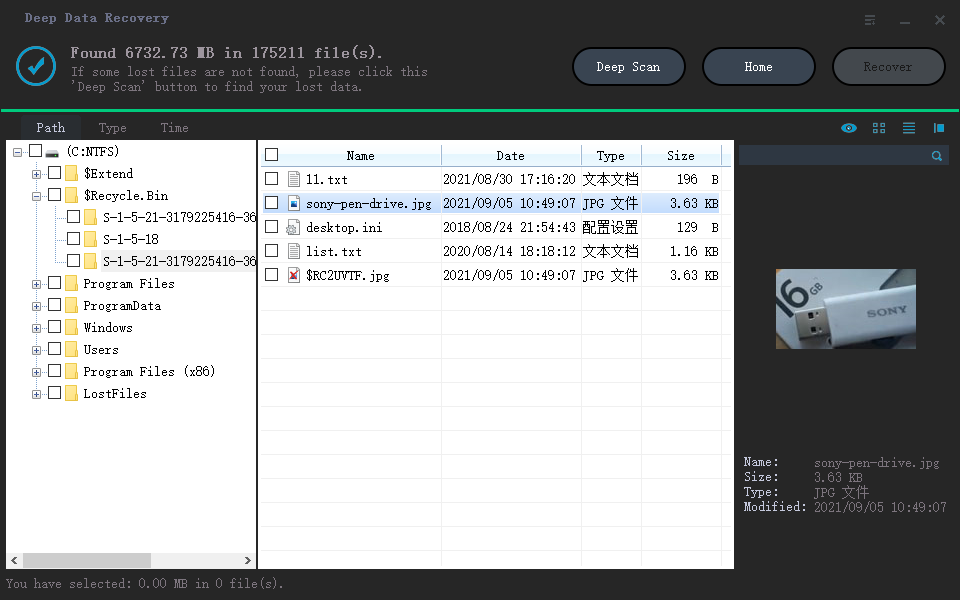
Step 4. Recover SSD files
Select desired data and click the "Recover" button to get back lost SSD files.
After restoring the data, remember to save it to another secure device.
Solution 2. Recover Data from Dead SSD on the Source Computer
Applies to: dead SSD disk data recovery on the source computer
When you don't want to unplug the dead SSD and connect it to another computer, don't worry. You still have a choice. To do so, you'll also need an empty external hard drive or a second disk for saving the restored data.
- If the dead SSD was used as a data disk on your computer, go back to # 2 and follow the steps to recover data from dead SSD with Qiling SSD data recovery software.
- If the dead SSD was a system disk on your PC, to restore the data, you'll need Deep Data Recovery with Bootable Media for help.
To do so, you'll need to go through the steps below for a guide:
Step 1. Create a bootable disk
Prepare an empty USB. If you have important data on it, copy the data to another device. When you create a bootable disk, the data on the USB will be erased. Deep Data Recovery WinPE Edition will help you create a bootable disk.
Connect the USB drive to PC, launch Deep Data Recovery WinPE Edition. Select the USB drive and click "Create" to create a bootable disk.
Step 2. Boot from the bootable USB
Connect the bootable disk to PC that won't boot and change your computer boot sequence in BIOS. For most users, it works well when they restart their computer and press F2 at the same time to enter BIOS.
Set to boot the PC from "Removable Devices" (bootable USB disk) or "CD-ROM Drive" (bootable CD/DVD) beyond Hard Drive. Press "F10" to save and exit.
Step 3. Recover data from a hard drive that won't boot
When you boot from the USB, you can run Deep Data Recovery from the WinPE bootable disk. Select the drive you want to scan to find all your lost files.
Click "Scan" to start the scanning process.
Recover data from the computer or laptop. After the scan completed, you can preview all recoverable files, select the targeted files, and click the "Recover" button to restore your files. You'd better save all of the recovered data to another place to avoid data overwriting.
To sum up, after the tutorial steps on this page, you've successfully restored all lost data on the SSD disk. Then you can follow this link to repair a not working, failed or dead SSD.
Solution 3. Use Data Recovery Services to Restore Lost Data
If the data recovery software failed to retrieve data from crashed SSD, you still have a chance to recover your data by using the manual data recovery services of Qiling.
Consult with Qiling Data Recovery Experts for one-on-one manual recovery service. We could offer the following services after FREE diagnosis:
- Repair corrupted RAID structure, unbootable Windows OS and corrupted virtual disk file (.vmdk, .vhd, .vhdx, etc.)
- Recover/repair lost partition and re-partitioned drive
- Unformat hard drive and repair raw drive (BitLocker encrypted drive)
- Fix disks that become GPT-protected partitions
Related Articles
- Fix Unknown USB Device - Device Descriptor Request Failed
- Fixed: WD External Hard Drive Not Recognized/Working with Light On
- Solved: What to Do with A Dying Hard Drive
- Memory Card Unlocker: How to Unlock SD Card Without Losing Data