Mac Photo Recovery: How to Recover Deleted Photos on Mac
How to recover deleted photos on Mac
- 1. Open Photos.
- 2. Select Albums from the column on the left, and double-click Recently Deleted (in older versions of Photos you'll find Recently Deleted along the top).
- 3. You'll see thumbnails of photos and videos you've deleted, well, recently, with a caption under each one indicating how long it's got left...
Quick Access to Photo Recovery on Mac
Whenever you lost Mac photos or pictures, you can bring them back easily. This page offers 5 effective methods to recover deleted photos on Mac. It is easy to restore Mac photos, whether you have a backup or not. Choose a Mac picture recovery solution according to your situation.
- Method 1. Recover Permanently Deleted Pictures on Mac (Recommended)
- Method 2. Restore Deleted Pictures Mac Using the Photos App (Within 30 Days)
- Method 3. How to Retrieve Deleted Files from Mac Trash
- Method 4. Recover Deleted Photos on Mac with Time Machine (Don't Empty It)
- Method 5. Recover Deleted Mac Photos from iCloud
If you deleted pictures from your Mac hard drive or other storage media, you deleted these photos permanently. But you can get them back with the best Mac data recovery software to recover deleted pictures on Mac. Get more Mac photo recovery details in the first method.
Method 1. Recover Permanently Deleted Pictures on Mac
Support macOS 10.15 ~ 10.9
If you have lost photos from Mac hard drive, you are unable to restore them from the Photos app or the Trash. All you need is the best Mac photo recovery tool like Deep Data Recovery for Mac. With it, you can recover deleted pictures in different image file formats with consummate ease, including JPEG, PNG, GIF, TIFF/TIF, BMP, PSD, ORF, RAF, MRW, RAW and more.
How to recover deleted photos on Mac:
Apply this software to restore your deleted pictures or photos on Mac hard drive or external storage devices like USB, SD card, or external hard drive on your own.
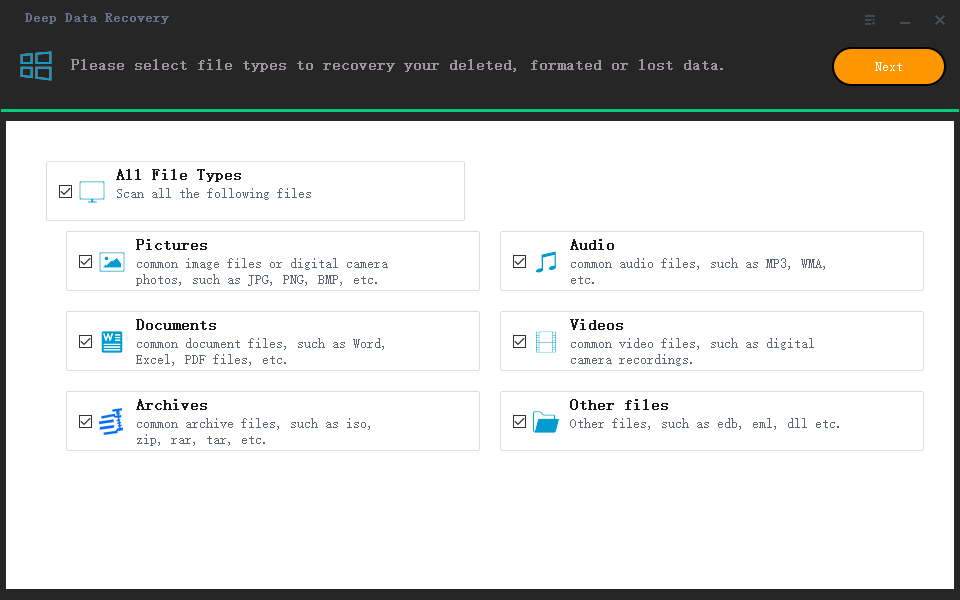
Step 1. Launch Deep Data Recovery. Select file types and click "Next" to start.
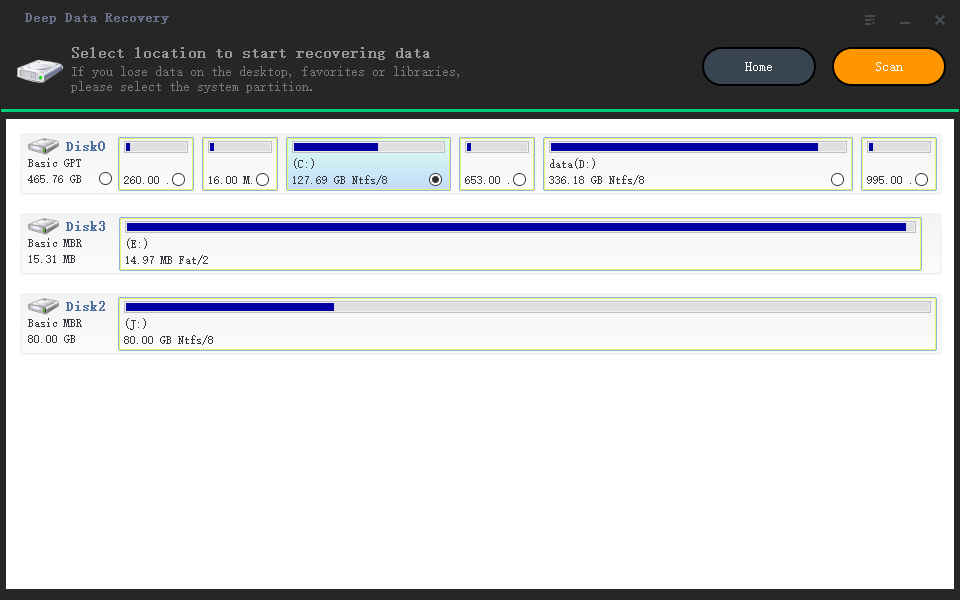
Step 2. Hover the mouse over the system drive where the Photos Library is, and click "Scan".
Step 3. After finishing the scan, click "Photos" in Quick Access. All your lost photos will list here.
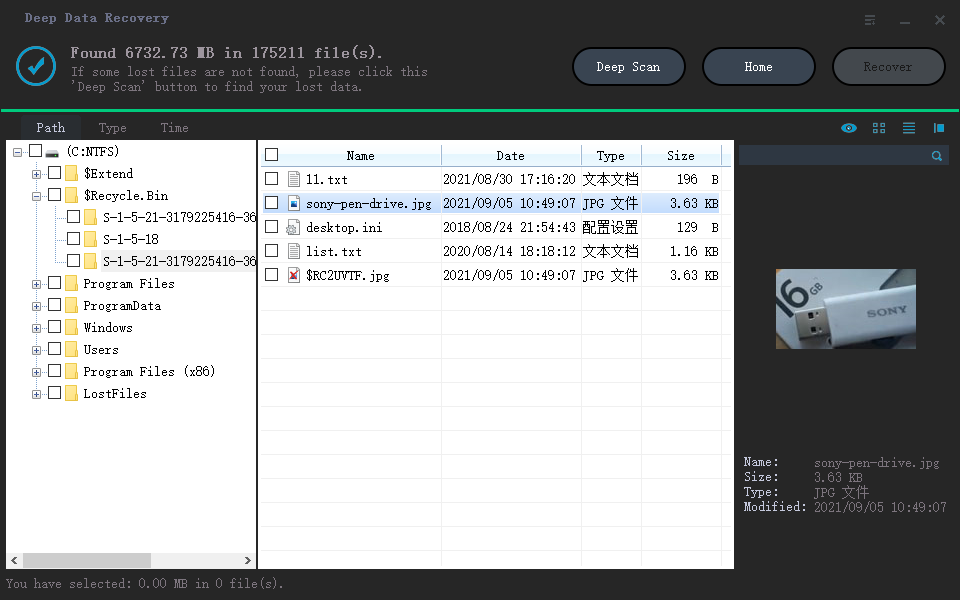
Step 4. Double-click to preview the photo, select the right one and click "Recover" to save the photos to another secure location on Mac.
This Mac picture recovery software fully supports Mac HFS+/FAT/NTFS/NTFS5 file system on macOS and Mac OS X. What's more, it works great in helping solve the following problems:
- Recover deleted photos, music files, and other multimedia types of data.
- Recover recently deleted photo with original name and path.
- Get back Mac data from SD cards, Compact Flash cards, USB memory sticks, PC hard drives, etc.
- Restore photos from partitions that have been lost, overwritten, or damaged by a virus on Mac hard drive.
Also read: How to Recover Permanently Deleted Photos on iPhone
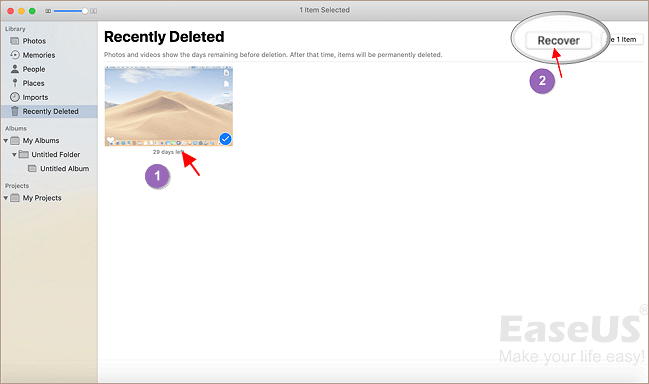
Method 2. How to Recover Deleted Photos on Mac Using the Photos App
The Photos App is a built-in tool on Mac to classify and manage pictures and photos. If you accidentally deleted photos or images in the Photos app, don't worry. The Photos App will save your deleted items in the Recently Deleted album for 30 days.
You can directly recover the deleted photos from the Photos App:
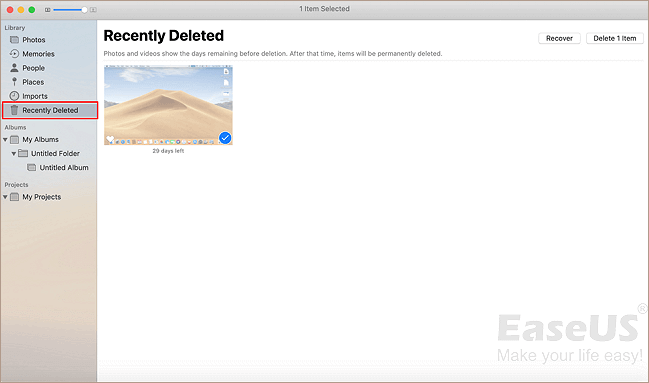
Step 1. Open Photos.
Step 2. Select Albums from the column on the left and double-click "Recently Deleted" (in older versions of Photos you'll find Recently Deleted along the top).
Step 3. You'll see thumbnails of photos and videos you've deleted, well, recently, with a caption under each one indicating how long it's got left. Select the photo(s) you want to get back.
Step 4. Click "Recover" at the top right. (If you want to save space and you've just deleted a bunch of large files, you're certain you won't want them back, you can also click Delete All.)
Then you can go back to the original album in Photos to check and use the recovered photos again.
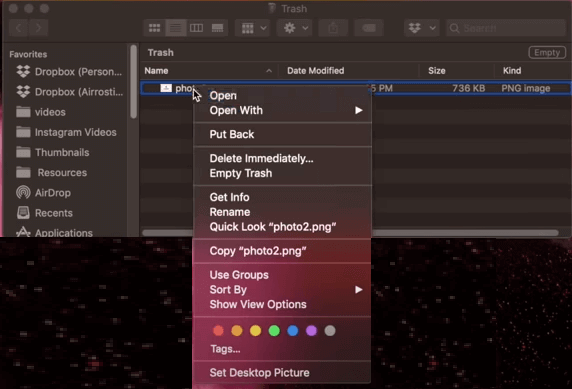
Method 3. How to Retrieve Deleted Files from Mac Trash
If you happen to deleted or removed photos from Mac hard drive or desktop to the Trash, you know that you can directly undo empty Trash and restore deleted photos easily.
Step 1. Open the Trash Bin icon on your desktop, and you can see all the deleted files there.
Step 2. Find the images or pictures you want to recover, drag them to the desktop. Or right-click on them and select the "put back" option to recover deleted photos on Mac from the Trash. The files will return to their original location.
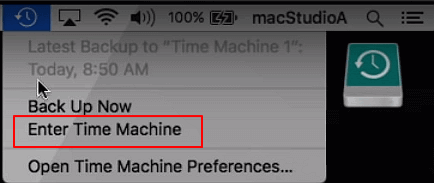
Method 4. Recover Deleted Photos on Mac with Time Machine
If you have created backups of the deleted photos with Time Machine, follow this method! Your photos, images, and pictures are all safe. And you can simply follow the steps below to restore the lost photos.
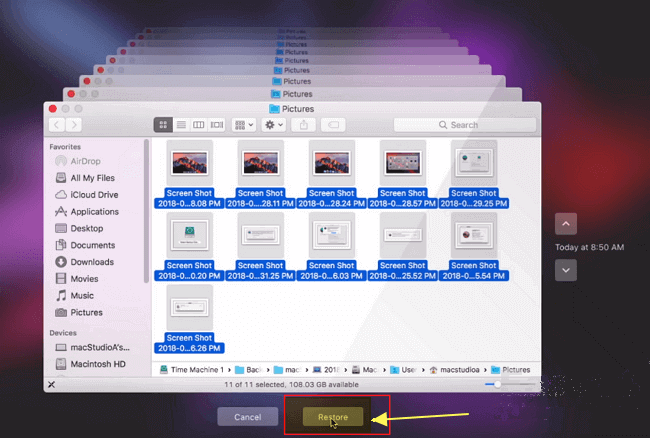
Step 1. Connect the Time Machine backup disk to your Mac and click the "Time Machine" icon at the Status menu on Mac. You can also click "Finder", and then open the "Time Machine" application.
Step 2. On the bottom and the right corner of the screen of Mac, scroll the Timeline to find the date when you did a backup of photos.
You can also click the up arrow next to the Time Machine window to find the right backup version. You can double-click a photo or picture to check if they are your lost photos.
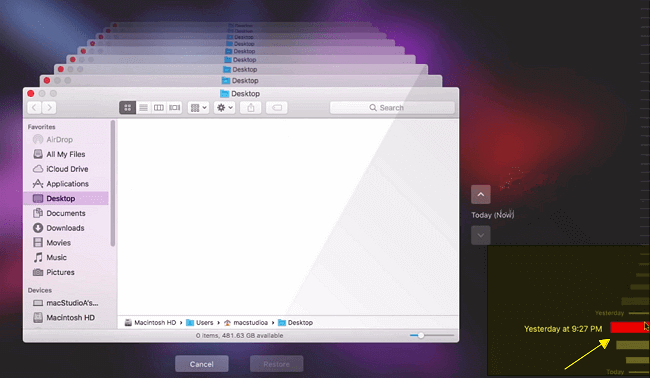
Step 3. Select wanted photos and click "Restore" to retrieve the old versions of overwritten files.
Method 5. Restore Deleted Mac Photos from iCloud
Most people use iCloud as the central repository for their digital lives, including everything from calendars to photos. iCloud Photo Library can save all the images you take with your iDevice, or upload to your Mac from a memory card, and send them to all your devices so you can view them anywhere.
Steps to restore Mac photos from iCloud:
Step 1. Go to iCloud.com in any web browser (you might need to sign in).
Step 2. Click "Photos". Then, click "Albums" at the top.
Step 3. Click the Recently Deleted album.
Step 4. Select the photos you want to restore and click "Recover".

Additional Tips - Reasons Leading to Mac Photo Loss
Pictures, photos, and images could be easily lost on Mac and other devices for various reasons. Here are the common causes of Mac image loss:
| Causes | Details |
|---|---|
| Careless deletion | Directly drag files to the Trash and restart Mac. |
| False operation | Permanently deleted files by using "Option + Command + Delete" hotkeys. |
| Virus attack | Your Mac was infected with a virus. |
| Formatting hard drives | Unexpected formatting happens during Mac device installation, system update, and more. |
| Other accidents | A sudden power-off or software failure occurs during the writing process. |
How to Avoid Mac Photo or Data Loss
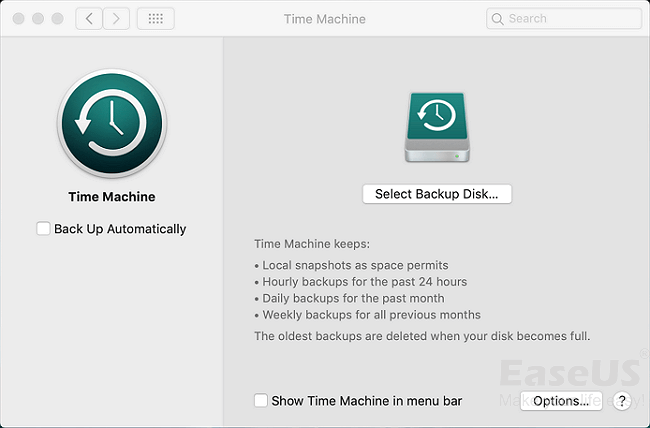
Many cases can cause Mac data loss. The easiest way to protect your data is by creating a Mac backup. macOS's Time Machine is a great built-in utility to handle backups automatically.
Back up Mac data with Time Machine:
Step 1. Connect an external hard drive to your computer or MacBook
Step 2. Go to "System Preferences > Time Machine > Select Backup Disk".
Step 3. Select the location where you want to save the Time Machine backups, and click "Use disk".
Step 4. Tick the "Back Up Automatically" option to set Time Machine back up everything on your Mac automatically.
Also Read: How to Backup Mac without Time Machine
Conclusion
These five solutions above can help you recover deleted photos from Photos App, Trash bin, Time Machine, or Mac hard drive/storage devices with Mac file recovery software. By the way, it's always better to have a backup of all your essential data to avoid data loss due to accidental deletion or other reasons. If you don't have any backup, Qiling Mac data recovery tool can always do you a favor.
Related Articles
- Recover Deleted iPhoto Library and Photos on Mac 2022
- Full Guide: Easily Format Text on Mac without Making Mistakes
- [Mac Guideline] How to Format SD Card on Mac
- Multiple Choices - Fix macOS Can't Repair the Disk