When you get the 'disk is write protected' error on USB or other devices, you can't make changes on your drive. Here is how to remove write protection from USB, HDD in Windows 10/8/7: [1] Remove write protection in 5 ways; [2] Let deep file recovery software restore all your files.
Don't panic when you see the "The disk is write protected" error for your USB drive. You can fix this by either removing write-protection or using another disk. This works for USB drives, SD cards, and even internal and external hard drives.
Part 1. How to Remove Write Protection from USB in Windows 11/10/8/7
In this section, we'll walk you through the process to disable write protection on a hard drive or a USB drive in Windows 11/10/8/7. We'll be removing the write protection from a USB drive in the following example.
| Workable Solutions | Step-by-step Troubleshooting |
|---|---|
| Method 1. Check Physical Lock Switch | Find the lock switch on either side of the USB...Full steps |
| Method 2. Run Diskpart Command | Open Command Prompt > Type diskpart...Full steps |
| Method 3. Edit Registry | Open Run in Windows 11/10/8/7 > Type Regedit...Full steps |
| Method 4. Turn off BitLocker Partition | Open Windows File Explorer > Right-click...Full steps |
Note: The fixes are listed from easy to complex. Follow them one by one to remove write protection from your USB flash drive, memory card, or computer HDD/SSD.
Method 1. Remove Write Protection from USB with Physical Lock Switch
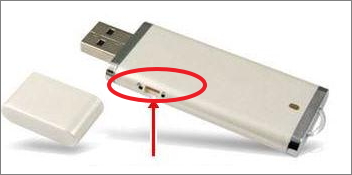
Sometimes, when the USB drive or the SD card physical switch is locked, the device becomes write-protected on all PCs and devices you connect it to. Let's see how to use the physical switch to remove the protection on your USB:
Step 1. Locate and turn the physical switch from ON to OFF on your USB or SD card.
Step 2. Connect the unlocked USB or SD card to your computer. Check if the write-protected state disappears.
Note that if your USB doesn't have a switch or the system still warns your USB is write-protected, follow Method 2 below to remove the write protection.
Method 2. Remove Write Protection from USB via Diskpart Command
This option clears the read-only attribute of your drive to make it writable. This works for your internal drives, external drives, USB drives, and even SD cards
Let's find out how you can use the Diskpart command to fix the issue:
Step 1. Press Windows + R keys and type cmd in the box that opens. This will launch Command Prompt.
Step 2. Type diskpart in the Command Prompt window and press Enter.
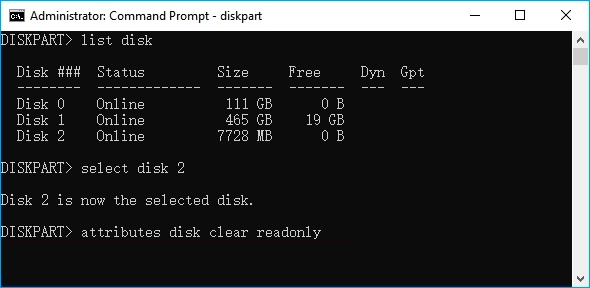
Step 3. Type list disk and press Enter to view the available disks.
Step 4. Type select disk 2 and hit Enter. Replace 2 with the write-protected device number.
Step 5. Type attributes disk clear readonly and hit Enter.
Step 6. Once the write protection removal process completes, type exit to quit diskpart.
After this, restart your PC and check if you can access and use the saved data on your USB or hard drive again.
Method 3. Clear Write Protection from USB Devices Using Registry Editor
Registry Editor also works to fix USB, SD, or internal/external HDD/SSD write-protected errors. This is an advanced-level procedure, and if you aren't sure what you're doing, you should probably not use this method. A wrong tweak to your computer's registry can cause many issues.
Be cautious while using this method to remove write protection on your Windows 11/10/8/7/XP/Vista computer:
Step 1. Connect your write-protected removable device to the PC.
Step 2. Open the Registry Editor by pressing Windows + R keys, typing regedit in the Run box, and pressing Enter.

Step 3. Click on HKEY_LOCAL_MACHINE and expand System
Step 4. Click Current Control Set and then click on Control.
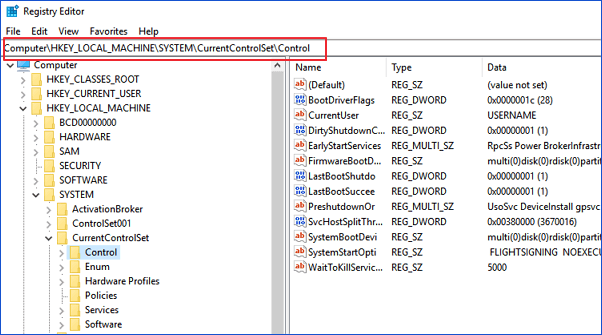
Step 5. Check Storage Device Policies and change the DWORD value to 0. Then, click OK.

Step 6. Exit the Registry Editor and reboot your PC.
Wait for the computer to restart. Then, check if your device is accessible.
Method 4. Turn Off BitLocker to Unlock Write Protected USB in Windows 11/10/8/7
When BitLocker is enabled on your hard drive partition, it protects your files with its encryption feature. To make changes to a BitLocker partition, you need to remove the protection from it first.
Here are the detailed steps of unlocking write-protected BitLocker USB or partitions on your PC:
Step 1. Open File Explorer, right-click on your BitLocker partition or USB drive, and select Manage BitLocker.
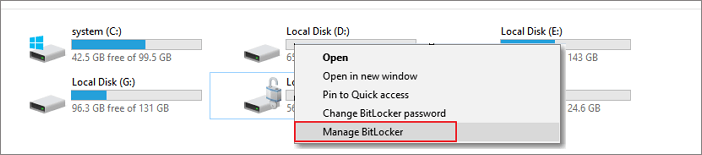
Step 2. Select the locked device and click "Turn off BitLocker".
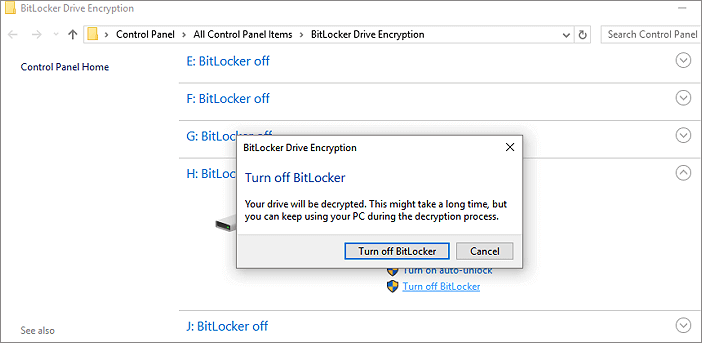
Step 3. Wait for BitLocker to decrypt on its own.
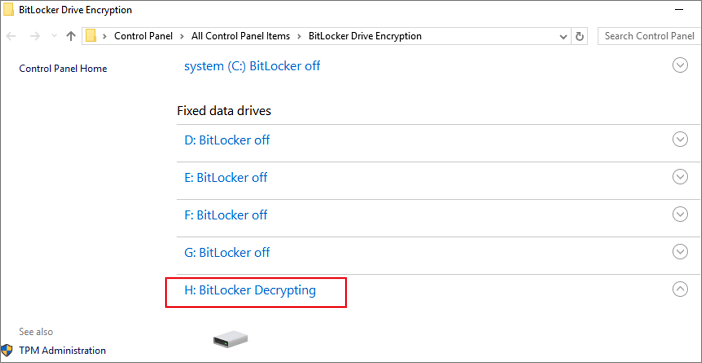
After this, with BitLocker off, you can manage data on your USB partition and save new files to it again.
Part 2. Recover Data and Format USB after Write Protection Removal
After removing write protection from your storage devices, you can access files and make changes to your USB flash drive or external USB drive again.
However, if files were lost or the USB is still inaccessible, follow through the two tips below:
#1. Recover Data First If File Lost After Removing USB Write Protection
Download Deep Data Recovery to recover any lost data during the write protection removal.
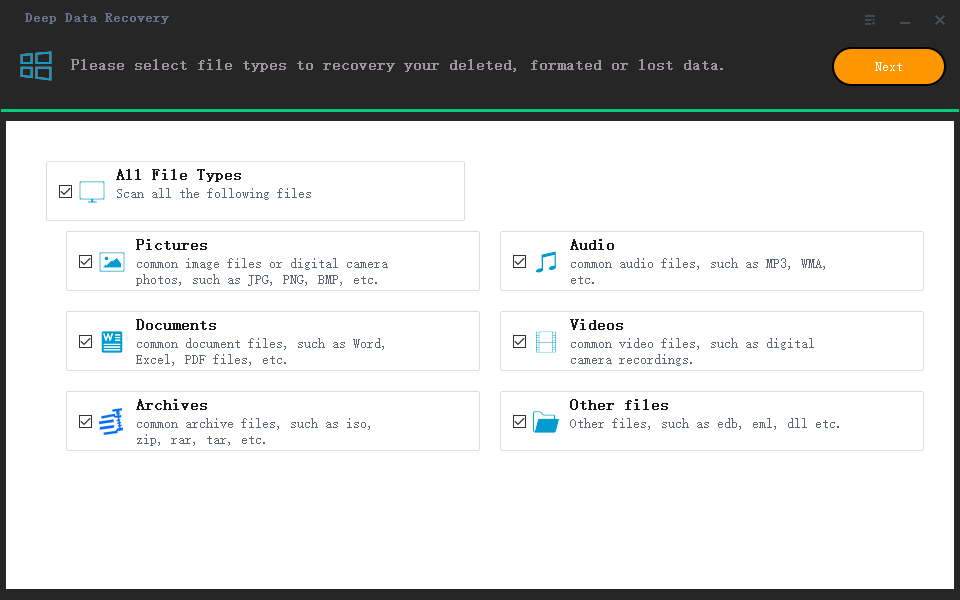
Step 1: Connect USB flash drive to your computer. Launch Deep Data Recovery and select file types that you want to recover. Click the "Next" button to start.
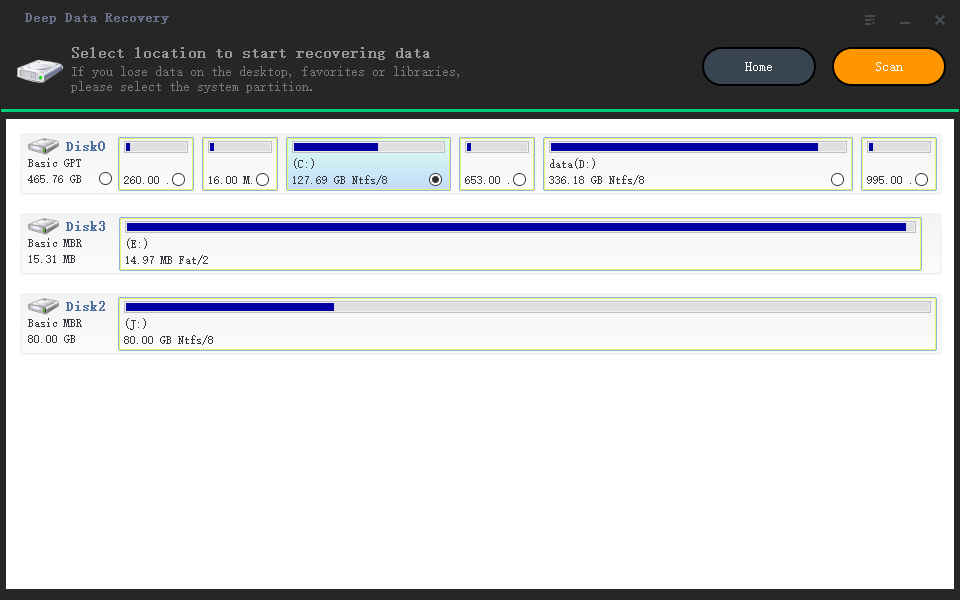
Step 2: Select the USB device. Click "Scan" button to start looking for lost files on PC.
Step 3: When the scan completes, you can apply the "Filter" feature or the click the search box to quickly find the lost files from USB.
If you need more data to be recovered, click the "Deep Scan" button.
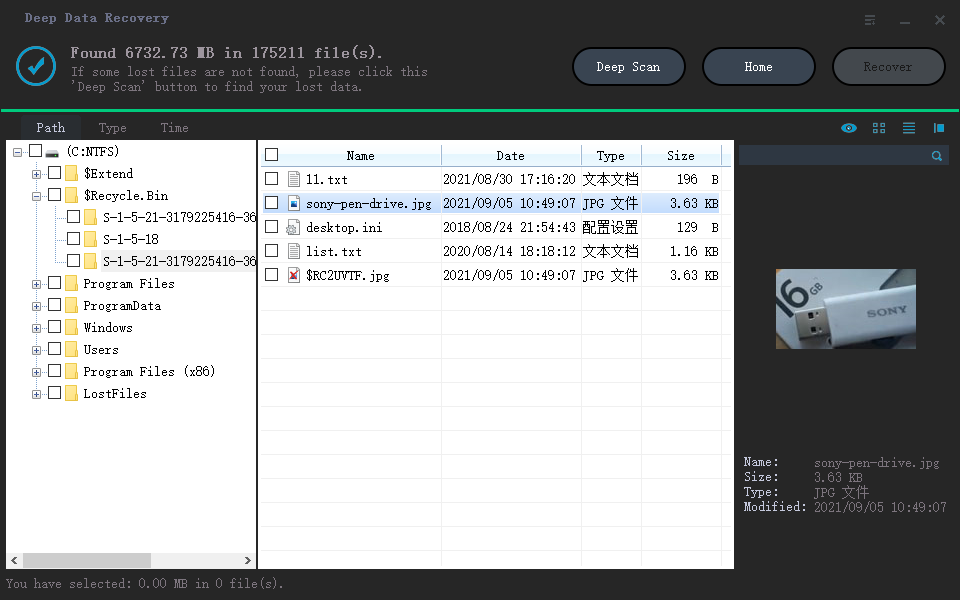
Step 4: Preview the files you want to recover. Click the "Recover" button to restore files.
#2. How to Format USB Drive to NTFS or FAT32
To ensure your USB drive remains in good condition, make sure you format it to NTFS or FAT32 filesystem.
To format the USB drive, connect it to your computer and format it with Disk Management using the steps below:
Step 1. Open the Run box by pressing Windows + R, type diskmgmt.msc in Run, and hit Enter.

Step 2. Click on Disk Management under Storage, right-click on your USB, and choose Format.
Step 3. Select the format for your USB drive as FAT32 or NTFS and click OK to confirm.

What Caused Write Protection on USB
Sometimes, people add write protection to files on a storage device from being modified or erased. However, storage devices like USB flash drive, SD card, internal or external hard disk may become write-protected due to the following reasons:
- 1. The physical switch of the USB is on the Lockside.
- 2. USB is set as Read-Only by mistake.
- 3. BitLocker protection partition is turned on USB volume.
- 4. Third-party encryption software or virus caused the disk is a write-protected error on USB.
The only way out is to remove write protection. By following the complete guide on this page, you'll make your device viable for saving and transferring files again.
Conclusion
This page offers five methods to help you get rid of USB, SD or internal/external hard drive write protection issues, including:
1. Swapping USB or SD card physical switch to the off state
2. Using Diskpart command to clear read only
3. Using USB write protection removal tool
4. Changing registry DWORD value to 0
5. Turning off BitLocker partition encryption
If you're wondering how to remove write protection from a USB drive on Windows 11/10/8/7, the guide above is all you need to remove the write protection.
People Also Ask
Below, we have listed some frequently asked questions and their answers to help you remove write protection from your storage devices.
1. How to remove write protection from the Micro SD card?
To remove write protection from your SD card, follow the quick guide below:
1. Run Command Prompt as administrator.
2. Type diskpart.exe.
3. Type list disk.
4. Type select disk 0. (0 -- disk number)
5. Type attributes disk clear readonly.
For a more detailed guide, follow How to Remove Write Protection and Format Write-Protected SD Card guides.
2. How can I remove the write protection from a single file?
If your file or folder is locked with a read-only state, you can unlock it from the write protection state with the following tips:
1. Right-click on the folder, select Properties.
2. On the General tab, uncheck Read-only next to the Attributes section.
3. Click OK.

3. How do you add write protection to a flash drive?
There are three ways to enable write protection on a USB flash drive:
Use USB write-protection switch.
Use diskpart to change read-only settings.
Change security permission in USB properties.
4. How do I remove write protection from Seagate external hard drive?
Connect your Seagate external hard drive to your PC and remember its disk number. Open Command Prompt, type the following command one by one, and hit Enter each time:
diskpart
list disk
select disk n (Replace n with the disk number of your write-protected Seagate external hard drive.)
attributes disk clear readonly
Once you're done with this, if you find any files are missing on the disk, consider using reliable a USB data recovery tool to recover your valuable files.
Related Articles
- Top 5 Best Free Data Recovery Software for Windows
- Best Free Data Migration Software for Windows 7/10
- Top 12 Data Recovery Software for Windows 7