How Do I Fix Permission Denied on Mac
Mac OS X operating system is Unix-based system for Mac computers. Now Mac runs all types of files and modifies all types of commands from the terminal. When the permission denied Mac error shows, these commands are sent from the terminal. There are many reasons to get these error notifications which are elementary and common. A complete guide has been available on this page to remove permission denied error over this computer. Follow all the steps given below to get access to all files and folders that are inaccessible.
| Workable Solutions | Step-by-step Troubleshooting |
|---|---|
| 1. Fix Permission Denied on Mac |
Method 1. Gain permission for files...Full steps Method 2. Check your permissions...Full steps Method 3. Change the ownership of...Full steps Method 4. Use sudocommands...Full steps Method 5. Assign permission for third...Full steps |
|
2. Restore Inaccessible Files on Mac |
Select the disk location (it can be an...Full steps |
Error: Permission Denied on Mac
If anyone faces a permission device error, they might see many different types of messages appear on the screen. The error message may be different, but the meaning is the same. Now some examples are given below. Let's check them out one by one.
1. Permission denied for files, folders, or disks on Mac - The most likely reason for permission denied error when you want to open a file or folder is locked. It might be because you don't have administrator privileges or the file is created to be locked.
2. Terminal permission denied on Mac - Many things come wrong when adding a command in the terminal. With the help of this error, no other file or the directory mentioned in it is not going to open.
3. App permission denied - The Don't Allow option is chosen, which is rejected at the time of using a feature related to the Application. There are very common things that deliver permission denied issues such as an app that couldn't use the camera, microphone, being unable to save files, can't share your screen with others, and many more.
Method 1. Gain Permission for Files, Folders, or Disks on Mac
There is a permission setting available on the Mac computer. With the help of that permission, users can assign permission to all files and folders so that they can be viewed and altered. That can be changed according to the requirement. You can change it by reaching the info window. Here are the steps to gain permission for files, folders, or disks on Mac.
Step 1. Choose any file or a folder present on the disk and then get info of that of the selected one.
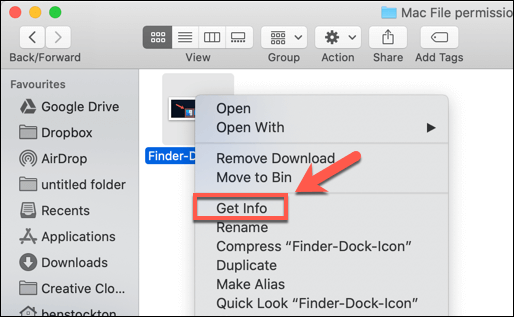
Step 2. If the selected permission is not visible in the info, click on the Arrow symbol.
Step 3. After that, the user will see a lock symbol to click on and enter the admin password and username to unlock it. After that user will see the assigned permission from the specific file and folder.
Step 4. Click over the name column and choose the privilege option available in the menu.
- Read and Write
- Read Only
- Write Only
- No Access
Method 2. Check Your Permissions
As mentioned above, one possible reason you might see the permission denied error is that you don't have file access permissions. Follow the steps below to check your permissions.
Step 1. Launch the Terminal in the Mac from the utilities.
Step 2. Type the command: Enter: ls -l. Make sure don't hit the Enter button but type the word.
Step 3. Drag the file or the folder into the terminal window.
Step 4. Now, hit Enter Button. Specific permission that is accessible to the current user will be visible on the screen.
Method 3. Change the Ownership of the Directory
You need to change the specific file or folder ownership. For that, you need to enter a Chown command into the Terminal and press Enter.
Chown -R $USER:$USER /path/to/directory
* Change /path/to/directory with the path to where you want to write to.
Method 4. Use Sudo Commands
The Sudo command gives you the ability to run commands as an administrator for about five minutes. If you failed running commands in Terminal again and again, simply add "sudo" before the original commands.
For example:
- sudo chmod 755 /dvtcolorconvert.rb
- sudo chmod 755 ~/Themes/ObsidianCode.xccolortheme
Method 5. Assign Permission for Third-Party Apps
In most cases, the Mac will issue a notification to remind users to pass all permissions when installing the application. In some rare occasions, you need to give permissions to third-party apps on your own. Here are the detailed steps:
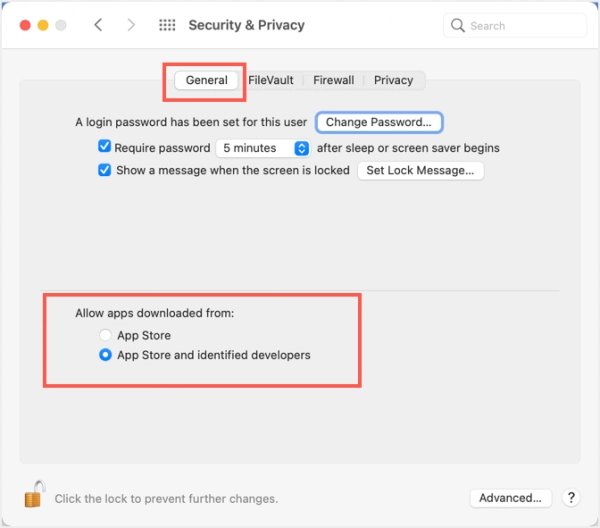
Step 1. Go to Security & privacy, then click on the General section.
Step 2. Enter user administrator username / Password to unlock the editing screen.
Step 3. Mark all the radio buttons that are showing App Store and identified developers
Step 4. Click on the Lock Button and save the changed settings.
Bonus Tip: Restore Inaccessible Files on Mac
Another method you can try is to apply third-party data recovery software. The reason why we recommend it is this kind of software can scan and search deeply in your computer's disk, and find all the lost data. No matter the data is deleted, hidden, or turned to RAW.
One such tool you can trust is Deep Data Recovery for Mac. With the help of this software, you can restore any type of file or folder that is lost, invisible, or inaccessible. This is not able to fix all types of denied errors that come directly, but only an option you can try after trying all possible methods.
Download Deep Data Recovery for Mac now, and follow the steps below to find your lost or inaccessible files.
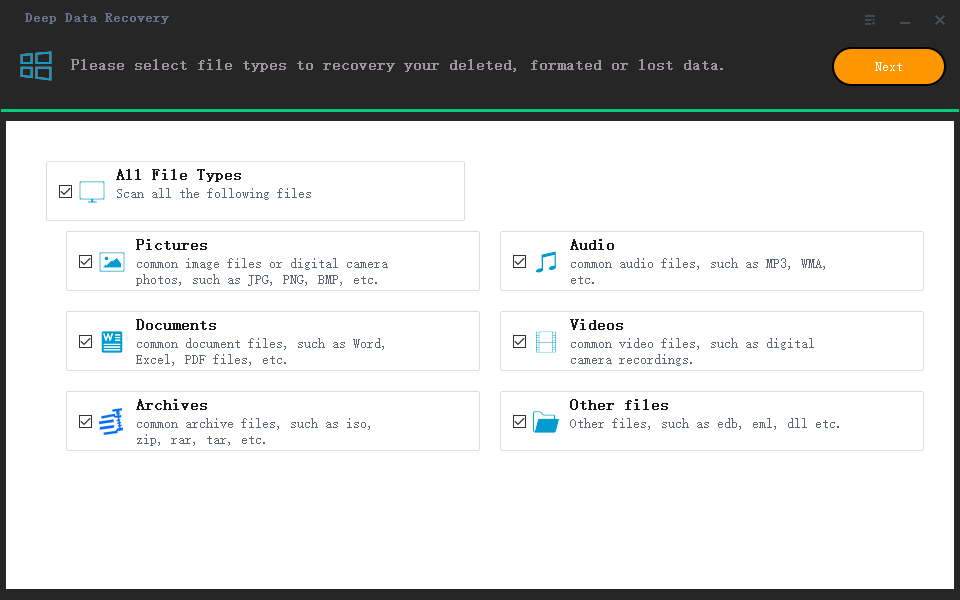
Step 1. Select file types. Click the "Next" button.
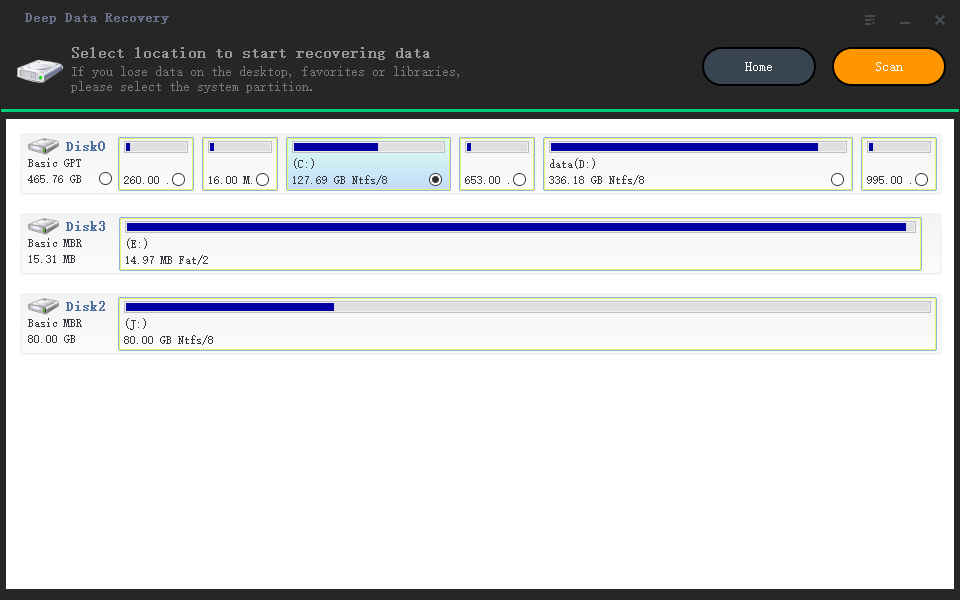
Step 2. Select the disk location (it can be an internal HDD/SSD or a removable storage device) where you lost data and files. Click the "Scan" button.
Step 3. Deep Data Recovery for Mac will immediately scan your selected disk volume and display the scanning results on the left pane.
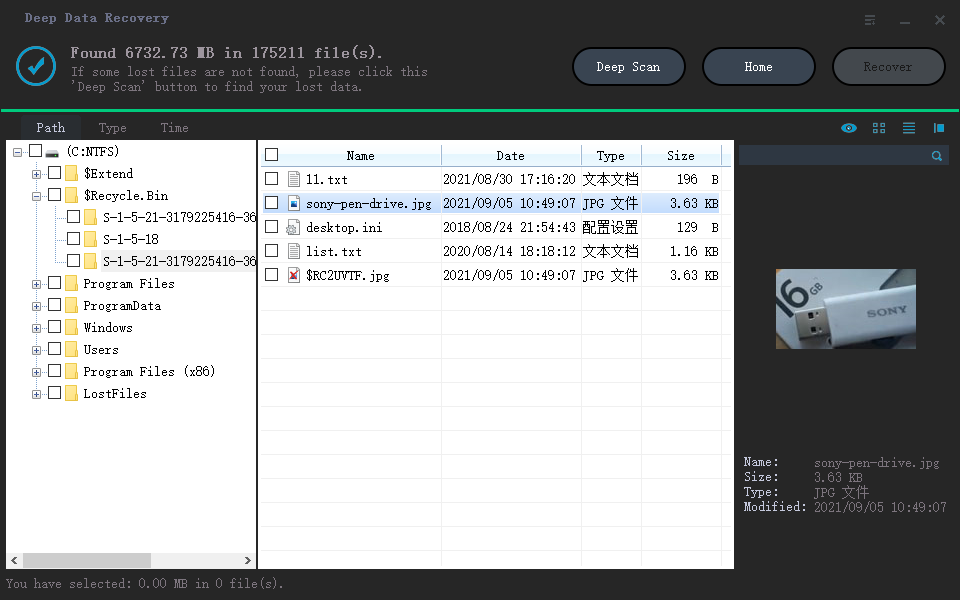
Step 4. In the scan results, select the file(s) and click the "Recover" button to have them back.
Conclusion
That's all about how to fix the permission denied error on Mac. Follow the given methods one by one, you can solve the problem by yourself. Or, you can apply Deep Data Recovery for Mac as the last resort to see if it can scan and restore the inaccessible files. If it failed again, it's also a good choice when you need to recover lost data from emptied Trash bin, or recover unsaved Word documents.
Related Articles
- macOS Recovery - What Can Recovery Mode Do when macOS Breakdown?
- How to Recover Deleted Files After Emptying Trash Bin on Mac
- Operations You Should Know when Switching from Windows to Mac
- [macOS Guideline] How to Enter Mac Internet Recovery Mode